Price-Point Comparing Three-Way Case Shootout
by Joshua Buss on January 13, 2006 12:05 AM EST- Posted in
- Cases/Cooling/PSUs
Raidmax X1 (cont’d)
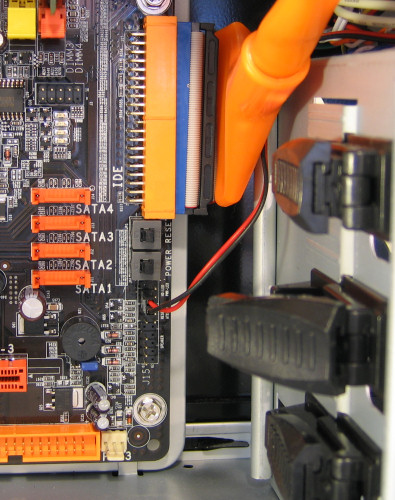
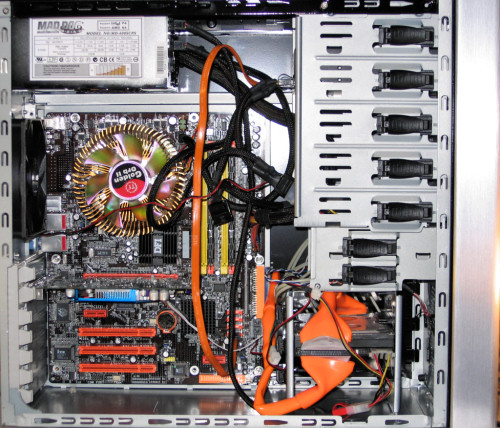
For the first of our pictures of a system getting installed into the X1, we thought that we'd show how the X1 also suffers from the same problem as the P150 in terms of making it a little hard to get side-mounted IDE cables into the motherboard. Thankfully, the access from the other side of the case makes it a little easier than in the P150, however; and nowadays, SATA drives are becoming more and more popular as users everywhere share the frustrations with thick IDE cables.
Sliding the hard drive into place and locking it with the single locking clip was simple and effective, and after connecting together the components, our build was complete. This picture doesn’t really do any justice, but the X1 overall just has a very nice feel to it and was a pleasure to work in. We didn't find sharp edges in the chassis anywhere.
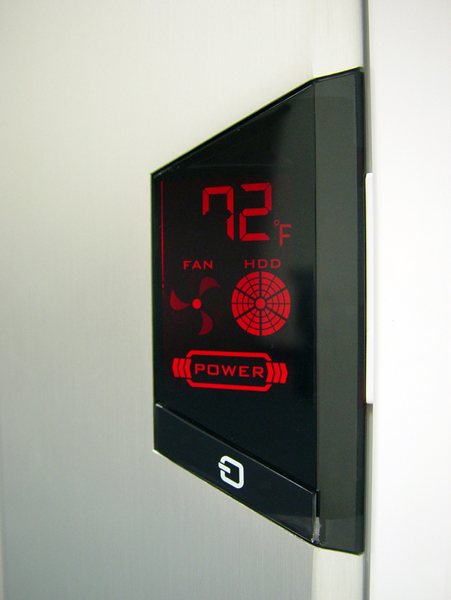
After putting the side panel back on and firing up the system, we were greeted with the X1's fanciest treat, which is a simple LCD on the front to display power, fan, and hard drive status as well as report a single temperature. Our efforts to do this unit justice were met with utter defeat, so we've borrowed this image from the RaidMax site to give you a better idea of what it really looks like. Just remember though that this picture comes from the white version of the case – on our case, the section to the right of the display is black.
For the first of our pictures of a system getting installed into the X1, we thought that we'd show how the X1 also suffers from the same problem as the P150 in terms of making it a little hard to get side-mounted IDE cables into the motherboard. Thankfully, the access from the other side of the case makes it a little easier than in the P150, however; and nowadays, SATA drives are becoming more and more popular as users everywhere share the frustrations with thick IDE cables.
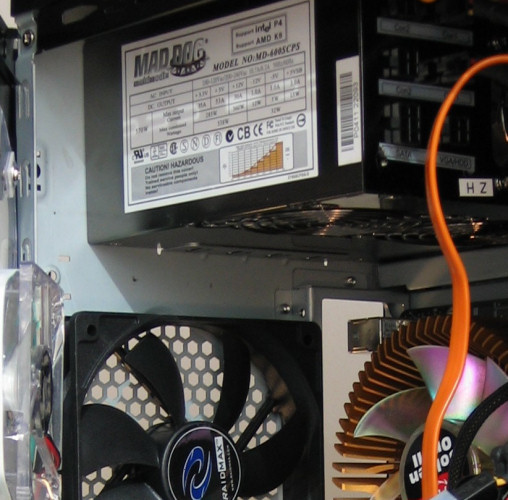
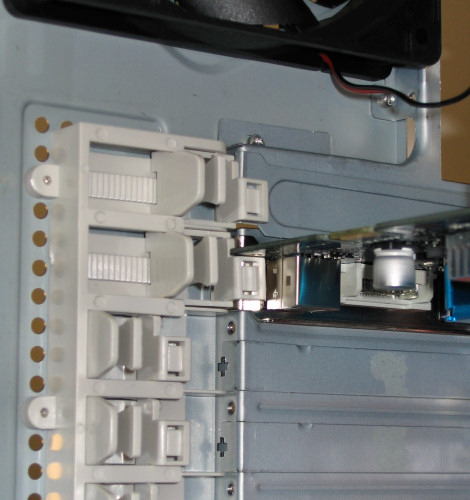
Sliding the hard drive into place and locking it with the single locking clip was simple and effective, and after connecting together the components, our build was complete. This picture doesn’t really do any justice, but the X1 overall just has a very nice feel to it and was a pleasure to work in. We didn't find sharp edges in the chassis anywhere.
After putting the side panel back on and firing up the system, we were greeted with the X1's fanciest treat, which is a simple LCD on the front to display power, fan, and hard drive status as well as report a single temperature. Our efforts to do this unit justice were met with utter defeat, so we've borrowed this image from the RaidMax site to give you a better idea of what it really looks like. Just remember though that this picture comes from the white version of the case – on our case, the section to the right of the display is black.




69 Comments
View All Comments
Chuckles - Friday, January 13, 2006 - link
I must say that as a computer geek, I prefer my computers to be able to work without space restrictions. Thus a side fan is really quite a pain. It means that I cannot set the computer against a wall on that side, which is where I typically put them. Its the one thing that really irks me about the Raidmax my PC is in. Apple and Antec (at least on the P150 and Sonata) have it right. Move airflow through areas that will always have clearance. The front and back of a computer will always have space to move air, likewise, if the case design is clever enough, the top and bottom can be made to always have air space. The sides are difficult to guarantee the airspace for without bulking up the width of the computer.Tamale - Friday, January 13, 2006 - link
You bring up a good point, but plenty of people put their computers on their desks too, and a side fan not only isn't an issue for them most likely, but can also provide for cool air to come in more directly on critical componentsmindless1 - Saturday, January 14, 2006 - link
Side fan almost always necessitates a front fan to keep hard drives cool enough. Some ignore this and use the side fan anyway... ever notice that some people have hard drive after hard drive fail then swear company "X" makes crap drives? Heck in our forums right now there's a thread about seagates overheating but when they point a fan at it, suddely it runs ok!Rebel44 - Monday, July 31, 2006 - link
Yeah they are going to fry at least dozen HDDs before they realize what they are doing wrong.kilkennycat - Friday, January 13, 2006 - link
Insufficient power for dual-graphics cards in combo with single/dual-core high-end processors.Extremely cramped. Difficult access for updates.
Constrained or near non-existent front-panel intake ventilation.
The failure of the P150 power-supply is not surprising. The power-supplies chosen to be bundled with many cases are not normally top-of-the-line.
Consider the Antec P160 instead --- somewhat larger, but far superior in many practical ways. ~ $110 @ Fry's and on-line. Aluminum. Screwdriver-less assembly except for the side-accessible hard-disk-tray shock-mounting. Slotted thumbscrews throughout. Removable motherboard tray, excellent cable-access. ample front-ventilation with intake filter, no silly front-panel door, front-panel individual flip-open shutters for dual CD/DVD-drives, tilt "front-panel" with dual thermal-monitor (very accurate too...) and including Firewire, dual-USB, microphone and headphone-audio sockets. Comes without any power-supply - great ! Power-supply choice can be tailored correctly for the intended computer application.
3 months ago I spent about 3 weeks of intermittent time looking at PC cases ( both on-line pictures and in-store physically disassembling/reassembling, much to the annoyance of sales-dweebs ) in price ranges from $250 to $50 before settling on the P160 for a very high-performance dual-SLI gaming PC. Just one externally obvious design defect - the huge on-off switch is far too easily accidentally pressed. I just left it disconnected and instead connected the far smaller and less-accessible reset-switch as the on-off switch. ( Pressing Reset is not recommended on a modern Windows PC anyway. A momentary press of the on/off switch normally triggers an orderly OS shut-down.) And I can just unplug the front-slot blue lights when/if I get tired of them. ( Sorry, I am just not into this "form-over-function" nonsense that has permeated the PC case industry. There are some pretty-looking but truly-awful case designs out there from even the stalwart case-manufacturers ).
BTW, in any further comparative reviews of PC cases, please give a tabular summary of the salient features/Specs of all the cases before plunging into individual detailed reviews.
huges84 - Friday, January 13, 2006 - link
I too bought the P160. After searching for three weeks I decided that it was the best for me. The only downside was the high price point. Fortunately, CompUSA had the case on sale for $100 plus there was a $50 mail-in-rebate. They only had one left and couldn't find the box, so I talked to the manager and got it for $50 out the door.I have had this case for a year now and I agree with everything the above poster said. Including the fact that the power button is too easy to hit. I think that I too will switch to the reset button. The only other downside to this case is that the Firewire connector is a bunch of individual wires that you have to match up to the correct pins. That is a pain in the butt.
There are a few more good features to point out about the P160. The side and front panels are lockable (the front you have to lock from the inside with your own padlock or bolt). Also, the rear 120mm fan is mounted on silicon studs to reduce vibrations. And the front fan is a single 120mm instead of two 90mm fans. Also, if you want a side window, there is an optional one available.
I too would like there to be a features table for each case like we get with motherboard reviews.
LoneWolf15 - Friday, January 13, 2006 - link
Antec's later models of the P160 provide both methods for Firewire, single plug and breakout, on the same cable. I'm using the single plug on mine. They also included two 120mm fans standard on the later models, whereas they only provided one early on. I have the side window model.I too agree that the P160 is one of the better cases out there (I also agree that the P150 is the only case in the review that'd stand a chance of entering my home). The only thing the P160 didn't have, I fixed: I now have a custom 120mm blowhole in the top that I made myself (picture at http://home.comcast.net/~dterborg/blowhole02.jpg">this link)with a 120mm Panaflo L1A mounted with rubber grommets to reduce noise. So my case has three 120mm fans instead of two. I've also quieted mine with sound dampening adhesive-backed foam sheets, and mounted my fans with gel inserts to quiet them further. It's indeed the case for everyone who needs the best of everything, without tacky looks.
kilkennycat - Saturday, January 14, 2006 - link
Where did you get the self-adhesive foam sheets ? I was looking at adding ~3/4-inch polystyrene to the 2 side-covers ( no window ), but your solution is simpler - no special polystyrene glue.LoneWolf15 - Monday, January 16, 2006 - link
It's called Pax-Mate. It's not the best noise-dampening stuff out there (and not nearly as thick as your polystyrene) but it's easy to measure, cut, and apply, and far less expensive (a kit of it can be had for $20 at FrozenCPU and some other places).I have totally different components now, but for a decent look at what I did, check out this forum thread on HardOCP (high bandwidth warning):
http://www.hardforum.com/showthread.php?t=834825">http://www.hardforum.com/showthread.php?t=834825
Tamale - Friday, January 13, 2006 - link
Opinion noted... and yes, these cases definitely are not for everyone, but many people are simply looking for a simple solution that's "good enough" for average components, and that's where the Raidmax really looks nice here.