A Trio of Thermaltake Towers
by Joshua Buss on August 16, 2006 2:30 AM EST- Posted in
- Cases/Cooling/PSUs
Thermaltake Eclipse DV - Internal
Taking a peek inside the Eclipse DV we see a rather familiar layout.
For better or worse the standard Thermaltake green clips are used to hold expansion cards in place. In previous reviews we've noted how these work fairly well for a majority of cards, but on some - such as the Audigy 2 SoundBlaster - they get stuck once locked into place. There is still certainly some advantage to keeping a case as tool-less as possible, but when simple screws really hold cards in place better and are more universally compatible, it's almost a shame Thermaltake continues to use the green clips in the DV.
Like most tower cases, the new Eclipse is reinforced structurally with a crossbar, which gives rigidity and extra support for the power supply as well.
Here you can see the 5.25" drives are secured with rails (which screw onto each drive individually). The dual removable cage design hasn't changed much at all from the original. Once removed from the case it's easier to see they latch differently from each other, but the good news is they're both tool-less designs which have been executed well.
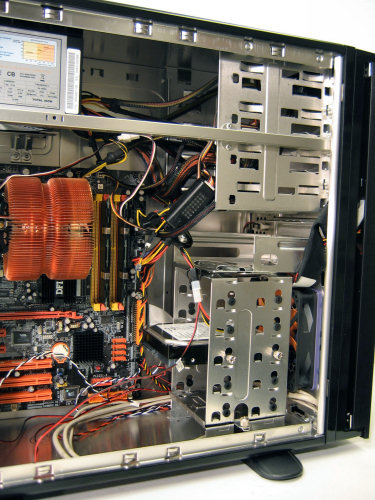
With such a small number of differences from the original Eclipse case we'll move right along to the installed test bed. Here one can see the lone ribbon cable leading from the slim drive. The cable isn't really any longer than it needs to be, and can be neatly tucked out of the way above the front fan, which is also removable. The bad news is that for people with only one IDE channel on their motherboard, only the single included drive can be used since there is no way to chain another drive on this cable. The accessory box that comes with the case and holds the extra parts (including the rails, keys, and a cleaning cloth for the window) can fit under the support for the hard drive cage.
Just like in the Eclipse, installing our testbed was problem free. The only caveat (other than the above-mentioned IDE port use) is that you really have to install the PSU before you can put the motherboard in, but this is true in many tower cases. The ample clearance between our hard drive and the front-facing IDE channel (a space often neglected) was appreciated.
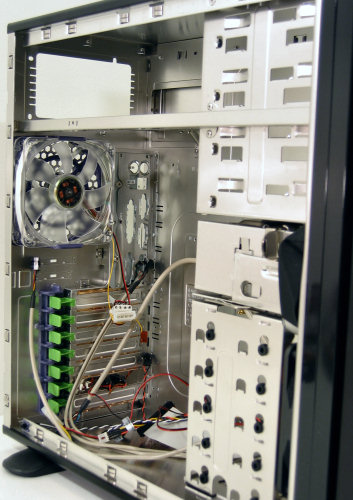
Taking a peek inside the Eclipse DV we see a rather familiar layout.
 |
| Click to enlarge |
For better or worse the standard Thermaltake green clips are used to hold expansion cards in place. In previous reviews we've noted how these work fairly well for a majority of cards, but on some - such as the Audigy 2 SoundBlaster - they get stuck once locked into place. There is still certainly some advantage to keeping a case as tool-less as possible, but when simple screws really hold cards in place better and are more universally compatible, it's almost a shame Thermaltake continues to use the green clips in the DV.
Like most tower cases, the new Eclipse is reinforced structurally with a crossbar, which gives rigidity and extra support for the power supply as well.
 |
| Click to enlarge |
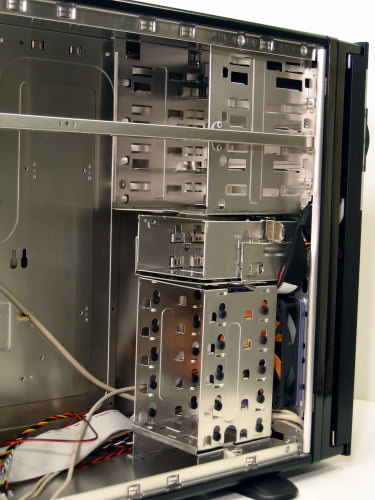
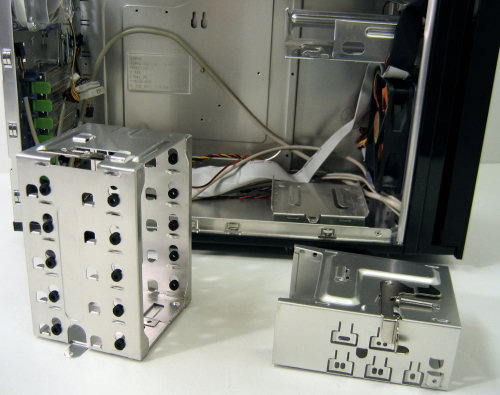
Here you can see the 5.25" drives are secured with rails (which screw onto each drive individually). The dual removable cage design hasn't changed much at all from the original. Once removed from the case it's easier to see they latch differently from each other, but the good news is they're both tool-less designs which have been executed well.
 |
| Click to enlarge |
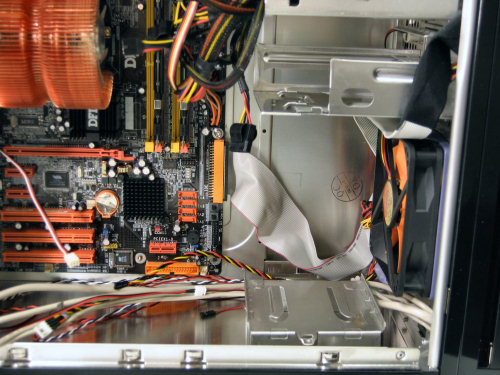
With such a small number of differences from the original Eclipse case we'll move right along to the installed test bed. Here one can see the lone ribbon cable leading from the slim drive. The cable isn't really any longer than it needs to be, and can be neatly tucked out of the way above the front fan, which is also removable. The bad news is that for people with only one IDE channel on their motherboard, only the single included drive can be used since there is no way to chain another drive on this cable. The accessory box that comes with the case and holds the extra parts (including the rails, keys, and a cleaning cloth for the window) can fit under the support for the hard drive cage.
 |
| Click to enlarge |
Just like in the Eclipse, installing our testbed was problem free. The only caveat (other than the above-mentioned IDE port use) is that you really have to install the PSU before you can put the motherboard in, but this is true in many tower cases. The ample clearance between our hard drive and the front-facing IDE channel (a space often neglected) was appreciated.
 |
| Click to enlarge |


43 Comments
View All Comments
mostlyprudent - Wednesday, August 16, 2006 - link
I have been wrestling over the case issue recently. I like the looks of the Antec P150, but need door to keep the kids from turning off the PC at random. I like the P180, but it's too big. I've considered the Sonata II, but want a different PSU. Any idea how the Aguila compares performance-wise to the Antec cases?KorruptioN - Wednesday, August 16, 2006 - link
Consider the Antec SLK3000B. No PSU, is decently quiet, very cheap, comes with a door (no lock though), and is about an inch taller. I have one (along with the new NSK6500) and am happy with it.JoshuaBuss - Wednesday, August 16, 2006 - link
The aguila would perform right up there with a p150 in terms of thermals. the p150 would be slightly quieter stock though (assuming you set its tri-speed fans to the slowest speed)