Clash of the Titans - TT Tai Chi vs. CM Stacker 830
by Joshua Buss on February 23, 2006 12:05 AM EST- Posted in
- Cases/Cooling/PSUs
Cooler Master Stacker 830 (cont’d)
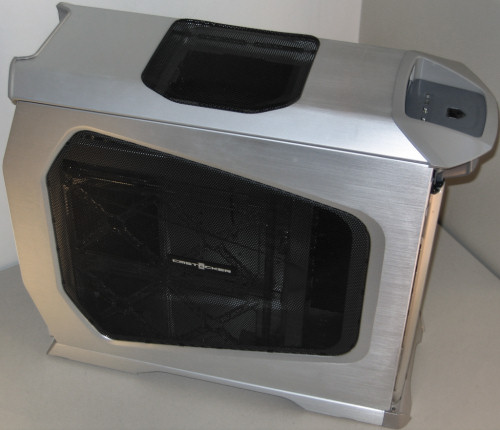
If the Tai Chi's approach to serious cooling is extreme conduction and convection, the new Stacker's approach is extreme venting and support for fans. In total, the 830 can hold 9 (yes, nine) 120mm fans. Four fit in the side panel (more on that later), three in the front attached to hard drive cages like the Tai Chi, one on top, and one in the rear. Now, we'll take a step back and examine the case from above at a further distance.
The top mounted vent on the 830 is passive by default (yet wasn’t in the system shipped to us), but a 120mm fan can be placed here if one desired. Something that pops out better in this picture than others is the handle configuration, which isn't as prominent as it is on the Tai Chi, but it is still just as useful and comfortable. Also in this shot, the holders for the four 120mm fans in the side are quite visible through the black mesh metal on the side.
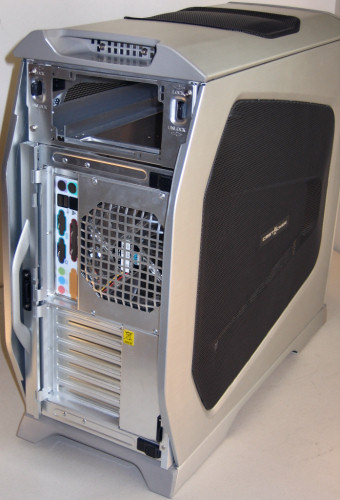
Looking at the back of the case, we get an even better idea just how configurable this case is going to be. The first clue is that the side panels are very easy to remove – a clearly labeled black plastic tab on the top is all that keeps them from sliding back and detaching. Right next to these tabs are screws, which hold the plate that attaches to the PSU in place. While still slick, we prefer being able to slide a PSU in from the side of a case as it's slightly faster and easier, although modular power supplies are making this less of an issue. One of the three included 120mm fans is visible in this picture as well, exhausting the bulk of the warm air directly out the back.
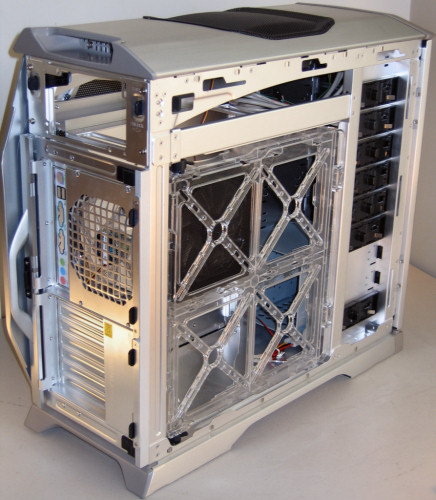
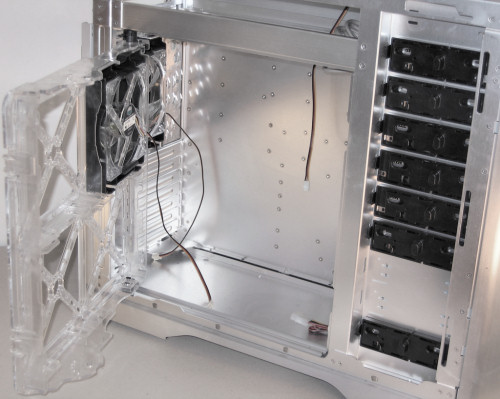
With the left side panel off, much more of the Stacker 830 finally makes sense. The main feature, the 4x120mm fan array, is clear plastic and can swing out and be removed completely if desired. Only one fan is included in the panel, and it's identical to the fan in the back. It's also easier to notice that it's pretty much impossible to fit a power supply in from the side or underneath – it will have to fit through the back area.
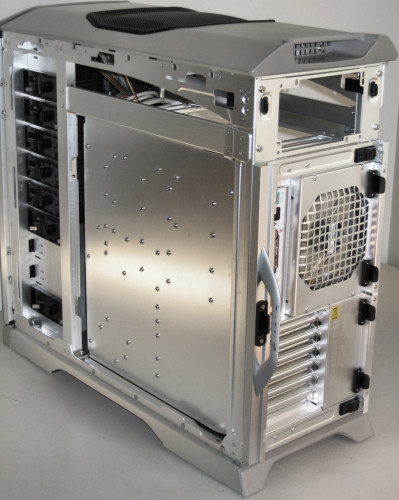
Leaving the interesting left side for a bit, we should note that the right side is, for the most part, identical – but without the fan array, it looks pretty drab through the black grill and we'd caution users against exposing the right side of this case more so than the left considering how transparent the venting holes make the panel.
To keep the Stacker 830 tool-less, it uses removable plastic and steel locks, which slide pins into the respective 5¼” drives. They work well enough, but we prefer Thermaltake's more elegant thumbscrew solution, for aesthetic reasons. Screws could always be used here too, of course, but Cooler Master doesn't provide the same large thumbscrews Thermaltake does with the case.
One might notice that it could be a little harder to work inside the Stacker than most cases with the side fan cage in the way, but as noted above, it is a cinch to remove.




55 Comments
View All Comments
tscholz - Sunday, April 30, 2006 - link
As for cooling, these cases are some of the most stupid designs i have ever seen. What are all those meshes doing on the stacker, but ruining the cooling performance. The proper way to cool a case is by using vacuum, and not by sucking or blow huge amounts of air in and out from all directions. A case should have one air intake (might be a few smaller ones), and one output. Only one fan is needed on the output, since it creates the vacuum to suck new air in from the input intake(s).And as for the Tai Chi, no those fancy fans on the sides does not do much (if anything) for the cooling. The energy transfer rate from the air inside to the alu casing is very little, and does not match the effects of fresh air constantly moving through tha case. The only thing these fans will do, is to collect dust.
There is no doubt that the interior of these cases are cool then full of fans, but why use that many when you don't have to?! More fans equal more noise, and does not make it that much cooler.
For reference, my case has a total of 2 fans (3 if you count graphics), one in the PSU, and one in the back that cool CPU and keeps air flowing through the casing. I blocked off all those extra holes in the back and front, to make sure that the air flows past the HD's, over the chipset, through my Thermaltake Tower 112 (damn it's big), and finally blown out the back. At a room temp. at 23 °C, the interior and CPU temp is 32 °C idle (53 °C load).
seanp789 - Saturday, March 18, 2006 - link
alot fo people are wondering if these things really work and there are debates on both sides.I bought the case recently and have come to this conclussion.
A typical heatsink is in direct contact with the heat source. The tai chi case only comes in contact with air for the most part. Now there is no doubt that there is hot air inside your case. The longer your case is running at full load the more of an effect that hot air has on surrounding components. While its true that air is less conductive that a directly contact, the massive surface area the case provides as a heatsink is what allows it to be so effective.
For doubters, take this simple test I did. Use a blow dryer to heat the side of your case, then use a blow dryer on the tai chi case. you will find that the tai chi cools itself much faster than a normal case. While i didnt take exact temps I timed the dryer exposure time and relatively how long each case took to cool.
chynn - Thursday, March 2, 2006 - link
After you can mount an ATX motherboard in the motherboard tray, you can use either the left (normal) or right (inverted) case slots to insert the tray.You can relocate the four fan array to either side of the case.
You can change the side the front door is mounted to, which is great for left-handed people like me.
You have to screw down all components mounted in the 5.25in bays with the provided screws. The snap locks are there only for positioning and/or testing purposes.
The stock fans are noisy, sleeve bearing, and low MTBF units. Not good for this costly a case. OTOH, the fans in the ThermalTake might be just as bad ... :)
JoshuaBuss - Monday, May 15, 2006 - link
Actually the front door can't be turned upside down so that it opens the other way. I tried.. it doesn't fit.The snap locks work fine for permanent mounting...?
The stock fans I received are VERY quiet, even at 12v.
fsardis - Thursday, March 2, 2006 - link
do you even own the case? have you even heard the fans? FYI they are both inaudible and i speak from first hand experience cause i own the thing.just because it has a sleeve bearing doesnt mean its noisy.
Systemshocked - Wednesday, March 1, 2006 - link
I purchased an Armor case last year, and my one gripe about the case is the tool-less expansion card clamp (that green and purple thing in Anandtech's photos). It's flimsy, and it didn't fit with my Geforce 6800 GT video cards. So I removed it.So much worthless processed hydrocarbon in my opinion.
And I wouldn't trust it to hold my cards in place if you're planning on transporting the case anywhere.
My two cents.
seanp789 - Monday, February 27, 2006 - link
the specs measure the tai chi at 600mm or a little less than 2 feet. I woudl like to if height is measured with or without wheels and handles. because the clearance below my desk is right on the borderline and im afraid the handles will make it not fit.r33tr33t - Sunday, February 26, 2006 - link
Why doesn't AnandTech review the Zalman Totally No Noise Series?The TNN 500AF is more expensive than either of these cases and probably has competitive build quality.
Aikouka - Sunday, February 26, 2006 - link
I was wondering if you'd use some possible higher enthusiast (or just tests for plain looney people). What I mean by this is for example, I am in the market for a new case right now, because I currently have 5 HDDs in my Xaser III V2000A. I built a computer for a friend with a 7800GT SLi configuration and both of his video cards run 20C cooler than my single 6800GT (both being BFG OC cards). His 4800+ runs cooler than my 4400+ and I use a Thermalright XP90C with Arctic Silver V where he used the stuff that came in the box. So, yeah... thermals are why my games sometimes will mess up, but I'm not sure what cases are a good choice.Like I said, it's kind of leaning toward enthusiast/looney to do tests where you up the thermal anty, but there are people with multiple hard drives in their machines and for people in predicaments like mine (where their hard drives sit in front of their only intake fans), they're in quite the pickle.
chynn - Thursday, March 2, 2006 - link
So what case are you using, friend??? It would help if we knew ... :)For example, one of the reasons I am moving to the RC-830 is that my Lian-Li V1200 case does not cool the SLI graphics cards properly, so the whole case runs hot.
I have purchased the V1200 "Plus" cooling kit and some 120mm Scythe SFF21F fans though to remedy that problem.
The Lian-Li has an Asus A8N-SLI Deluxe, FX-55, 2x eVGA 6800GT 256M, 2x 74G WD Raptors and a hard drive in it.
The RC-830 will have a DFI LanParty UT Expert, FX-60, 2xeVGA 7800GTX ACS3, 2x 150G WD Raptors and a hard drive in it.
Both cases have a DVD reader/burner and a floppy drive in them.
From looking at the two cases, the RC-830 has the better cooling solution by far ... even after the Plus kit is installed in the Lian-Li.